expr:class='"loading" + data:blog.mobileClass'>
Showing posts with label my office. Show all posts

Friday, April 10, 2015

Office chair makeover

hello there loves!..busy busy week like always since I'm back to work i have two new clients witch I'm basically doing their whole home ! yikes!.. but last week i decided to finish couple things in my office well to make it comfortable for me to work from .


Ive been debating for months on what kind of chair i can but in this space main function had to be comfort second style ( and i was in a bit of a low budget) i found some at our local rehab center that was great !! but after trying it out for a few months i just couldn't see it in the space . it was just to bulky . until last week when we stared renovation the dinning area {finally } oh also guess what  ??!! we are not going to be moving for a few now since our lease got extended two years so we can save a bit more and have more options when we try to build again also because we are thinking on buying this home and renting it out to my younger brother  . but thats feature plans and will see how everything turns out later {ill keep y'all posted}


So back to the chair  we didn't need the chairs in our dinning room anymore so i decided to bring two of them down to my studio/office space because well they are very comfortable  and since i wasn't digging the original faux leather look i opted for some cute fabric i had hanging around in my craft closet {that reminds me i need to organize that asap so i can finally put it up #onzeblog }.


This is the chair i stared with please dont mind the dirt since after we didn't have any use for any anymore it was storage in our back room storage in the garage and there it go all sorts of dirts but after a good cleaning like new minus some wear and of course thats normal after 6 years and also not being a great material to start with and with small kids dont get me stared .


I decided on this over loop fabric i have hanging around the craft closet  that i just heart .


This is what it actually will look like in the chair ..


I stared at the top and worked myself down . It was a fairly ways project since I've done a few quite like this before .


I didn't wanted to take the leather of i just covered it with the fabric witch by the way is super tick so you could not see any leather beneath it no matter how much you try .


this is what the back looked like by this point.


I wanted to give it a little me and well there is no me without flowers and colors and well i had this fabric brought to me from brazil witch eu amo  {i heart} and well there was no debate on what to do with it .. isn't it sooooo pretty.!!


since i wanted to cover the seams and what not i added some of this awesome nails same process i did when we made our bed.


The fair originally had this lithe seem in the back so i tough of doing one as well ..


and well this what the back looks like ..


and this is the front .


and until next time...


Monday, March 2, 2015

Faux marble desk


Happy Monday y'all !..Since my hubs made the X desk I've had a little tickle inside of me that it needed more of stone look i dont know why !! but i just did and after browsing in that little addicted site called Pinterest i found many cool and amazing projects done with contact paper that simulate stone ! say what ! ??! .So after the conclusion of about 30 pins of marble contact paper i decided that it was the only route to take . So i ordered !! at first i was a bit spectacle about faux marble paper but when i got the rolls i just couldn't believe the quality and feel to it it was just insane how look a like to real marble it is not counting the soft feeling of it. 


At first i was going at fit nuts because it was my first time using contact paper on a peace of furniture and i really didn't want to mess up but also to my surprise was very easy to use as well as if i see any imperfection witch trust me i did {ocd in me cant help it} it was very easy to peal and stick back on without a problem .


For their bubbles i have this spatulas i got a while back from home depot . the come 3 in one pack for maybe less than 7 buckaroos and even that they are plastic they are very strong and they do the job wonderfully {not a single air bubble was left thanks to my handy handy spatula machine }


And here is the final product !! what y'all think?? .. personably i am in love with it . it has the feel of stone as well as the shine  couldn't heart it more if i could .


The sides where a bit tricky for me but i think i got the hang of it after couple times i had to unstick it and stick it back up ..{not at all frustrating }


And with this i give you a little tinny tour sneak peak of my office ...


Until next time ...

Friday, February 27, 2015

Inside my drawers (desk)

Yesterday i shares how we made my awesome X desk  and today i would like to share how i organize the drawers so far . To this there is not much magic or thinking i just used what i had in hand and i only put in what i need almost on a day basis so it won't clutter the little space i had . All the other things are in the closet i would like to call the craft closet  this is an unfinished closet like most of the downstairs of our current rental that i use to store a lot of office , crafts and decor things but more about that later .. back to the drawer situation .

For starers the two drawers on the size are 18inL x 10inW and the center is 18inL x 25inW .to me they are pretty good size drawers also they all have a hight  of 4 1/2in that also was sufficient for me .

Now lets take a peek inside ..


I stared by laying some wrapping paper just like i did to the acrylic tray ..


Next step was to organize everything according to my needs .

I got some acrylic organizers at the dollar spot at target that fit like a ring they where exactly what i needed and without spending a fortune .

On the left drawer u put all the things i use the most with my camera ,computer and so on .. An extra lens some lens covers extra memory cards another little digital camera for little things extra address labels and stamps and some batteries and chargers


Middle drawer thats where i keep my most important binders , agendas , planners ,labeler {hello my name is Alina and I'm a label-holic}.and some notes pads and sketch pads for inspiration also i recently got a love note from my oldest kid and i keep there close to me .


Since most of my writing and scrap booking and crafts i do on the right side of my table it was only logical to have this drawer here with all i need . like wash tapes ,ruler paper clips , extra label tape, a measuring tape , ruler, magnetic tags , an old iPod with really good music on  and sometimes when i like to exercise my brain i like to play with the pocket IQ test ..


Did you know that they have gold foil label tape now !! i was in heaven when i got it,,!! 


This is the side view of the desk ..


Well i hope you enjoyed my little drawer tour ill be bringing more goodies tomorrow...

until next time ...


Thursday, February 26, 2015

X Desk


For a few years now I've had this obsession with the x desk i was in love with this one  but i just could put the trigger to over $1000.00 {at least for me when i have a family and kids are involved sometimes other things get priorities and what we want is not really a need  }. so i continue my search for a lower price x desk and i found this one  and for almost $300.00 wasn't that bad but i still didn't see what i was looking for in it then i found this beauty  for a littler over $ 200.00 and well i was already on my way to purchase it when life got in the way and i couldn't  because i had to take that money to make a unexpected trip .

Anyhow as you might think yes i was very sad and a bit disappointed but not to worry my super man husband came to the rescue and oh did he delivered ! i got to design my own X desk i was beyond happy by this point i just had to get to my design board start some sketches with i did and i shared with everyone back in 2014 on instagram . {if you dont follow me already you should this is where i do all my sneak peeks and post everything on my radar }.

So we headed to our near best friend store Home Depot or like my kids call it our second home and picked up some materials .


What we used : 


Materials :
4 ; 6ft 1 1/2in x 1 1/2in 
3 sets of drawer sliders 
6 ;  6ft  12in  x 1/2in
1 can of Behr paint in white a combo of paint and primer 

Dimensions of desk are :31in H  x  30in L  x  62in W 


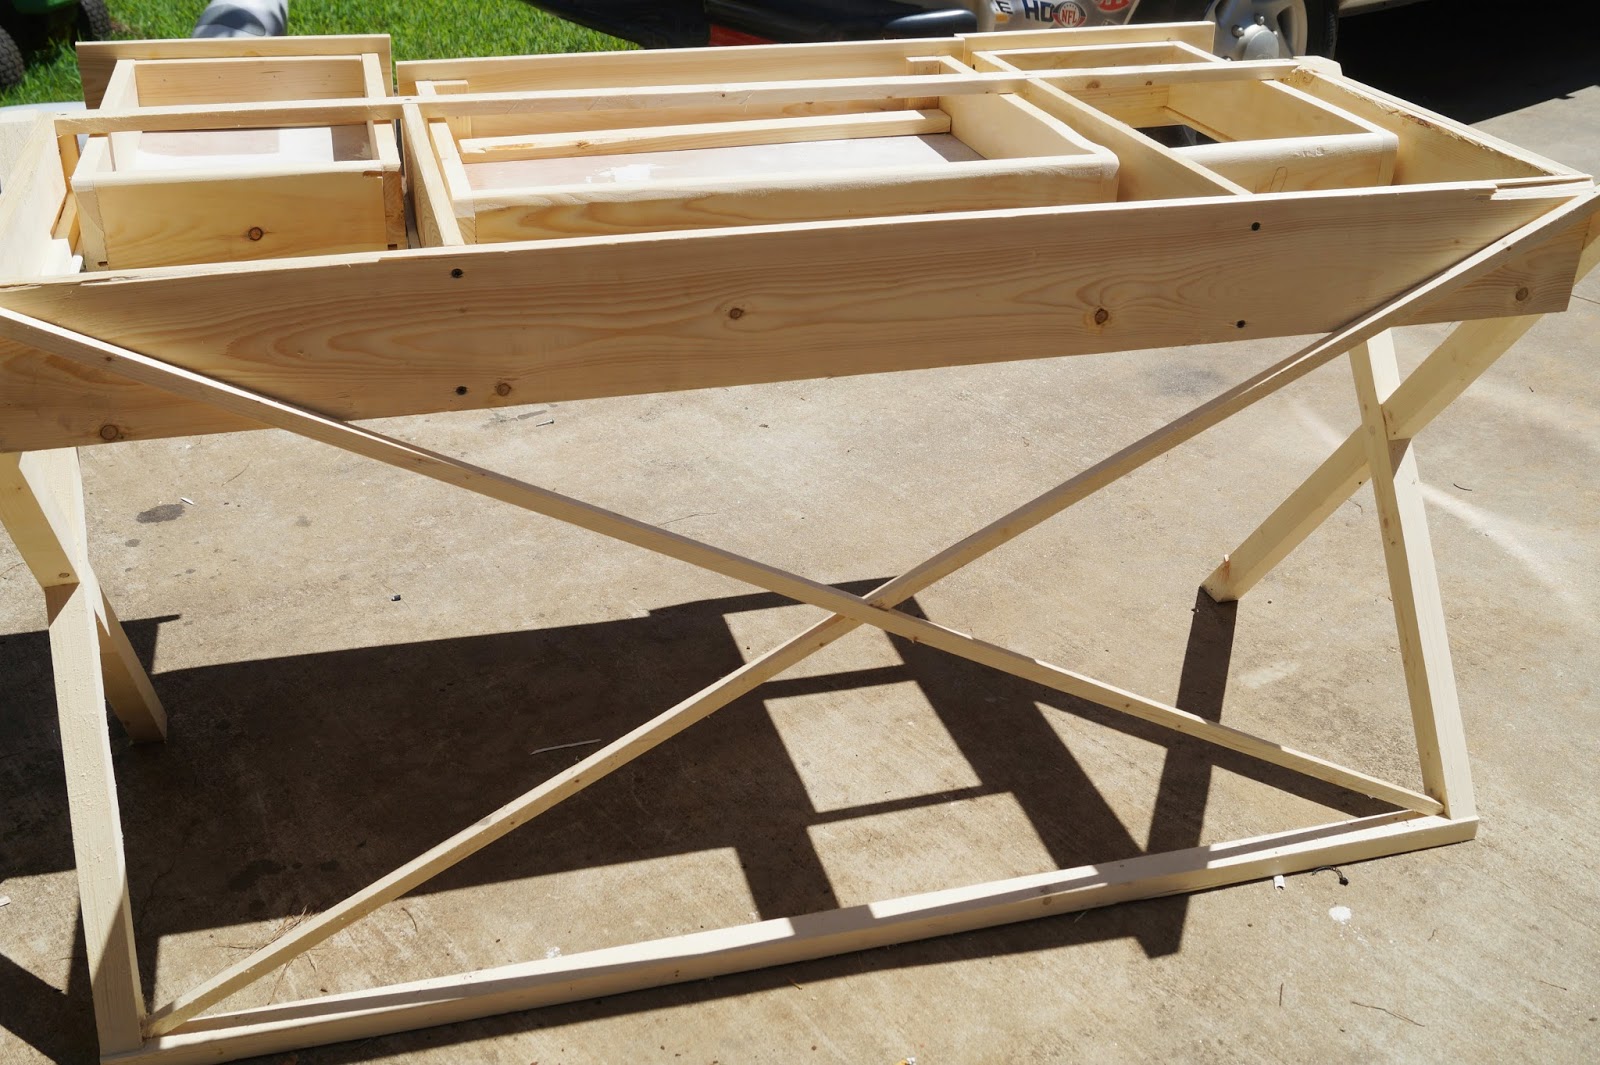
He stared with the legs he made some inserts and pre drilled a whole so the legs fit very tightly almost making them into one. 


He used glue as well as he drilled them both together and covered it with a wood dowel that later he took down to size so everything could be seamless .


Then he did the same to the legs so both legs could seem like one .


And this is where i put my stamp i decided to do another X in the back for extra  support and also for decoration purposes .


Sense the wood wasn't flawless he covered with some wood potty ..we letter dried and return to wiped out any access  and sanded everything down .


then he stared the drawer process ..


All those wholes do to the screws will be later covered by potty and sanded down and painted over


Unfortunately i lost some pictures of how we put the top and well we used a branded nail gun from the inside of the desk to press the top to the bottom as well as wood glue also to get the meatless look on top we glued 2 pieces of the 12 x 1/2 and used 1 6 x1/2 and clamped all down and waited until dried to put wood filler where needed and sanded everything down smoothly with the rest of the desk .


next step was painting the drawees for that i took them out of the desk and placed them in a work table and gave it couple coats of paint  


At first when i applied the paint you could see the strokes but after dried it was almost impossible to see .


  After being dried for a day and a half we brought it in to my studio .


well and there you have it :)...


until next time ..